Creating Accessible PDFs with Word
For basic (i.e. read-only, content focused) PDFs, the steps are relatively simple:
- Write accessible content
- Save As a PDF, preserving accessible properties
- Prevent Mistakes with "Restrict Editing"
1. Write accessible content
We direct you to read WebAIM's article "Microsoft Word - Creating Accessible Documents". Read Page 1 (which is linked) to understand the concepts, then read the appropriate section (Page 3: Windows Word 365 or Page 2: Mac Word 365) for your version of word to learn how to apply those concepts.
In summary:
- Use headings (See Windows - Headings, Mac - Headings)
Break down the structure of your document with headings for sections and subsections
- For every image, add alt text or mark decorative (See Windows - Alt Text, Mac - Alt Text)
Vision impaired users can't see images, so they need a text version of the same info or the image must be hidden (mark decorative) if it is redundant to already existing text.
- Add at least one header row/column to tables (See Windows - Tables, Mac - Tables)
Screen readers navigate tables cell-by-cell, and properly marked headers are needed to tell what data is being displayed in what cell.
- Write descriptive link text (See Windows - Links, Mac - Links)
Descriptive links increase usability for all, by ensuring link purpose can be understood quickly and without surrounding content.
- Use lists and columns (See Windows - Lists, Mac - Lists, Windows - Columns, Mac - Columns)
Lists and column layouts made without proper layout will be difficult to impossible to navigate for screen readers, and can break PDF reflow functionality.
2. Save As a PDF, preserving accessible properties
When exporting to PDF, you must follow these steps to ensure correctly markup and metadata is preserved in the final PDF. Otherwise, the efforts to structure the content accessibly will be lost.
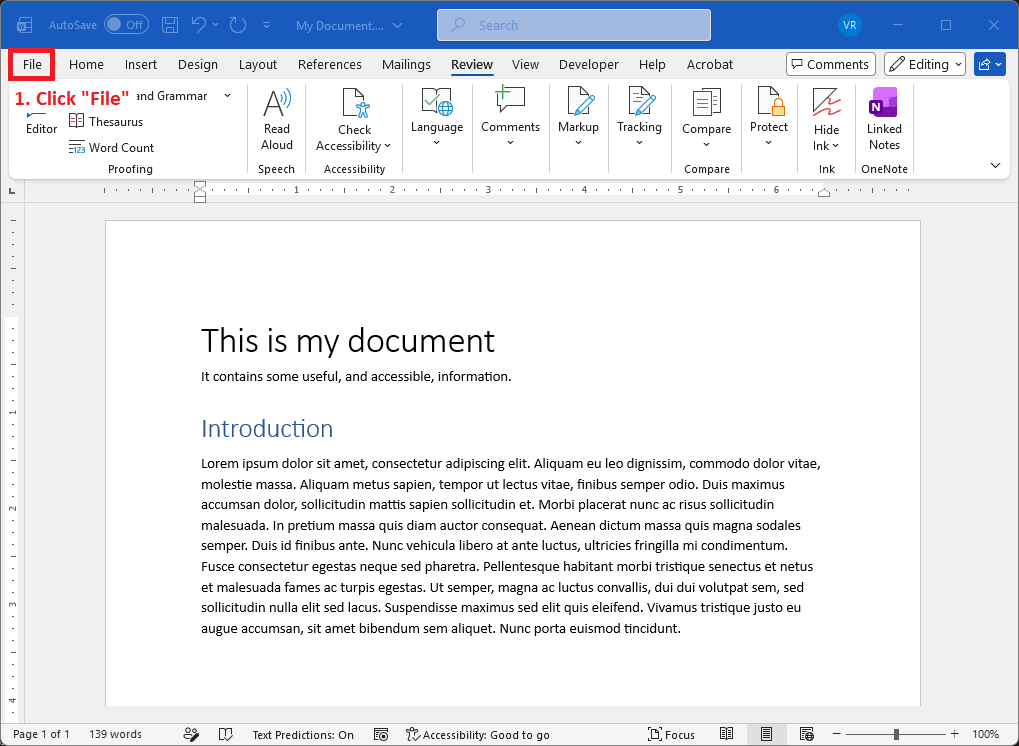
- Open the "File" tab
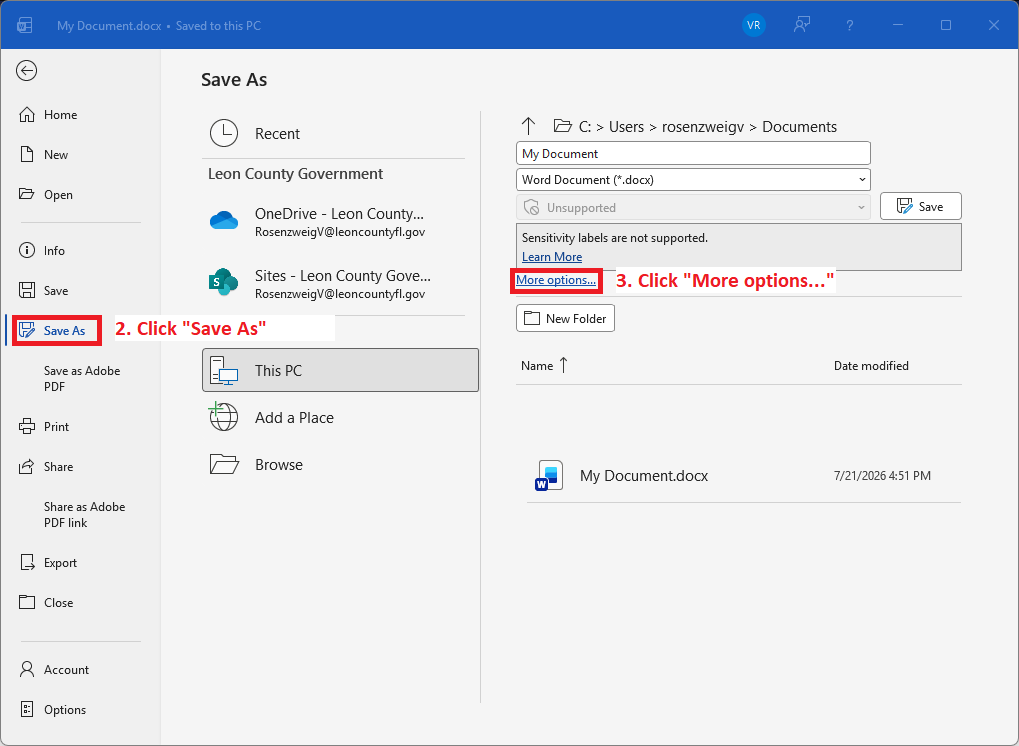
- Navigate to " Save As"
- Select "More Options..."
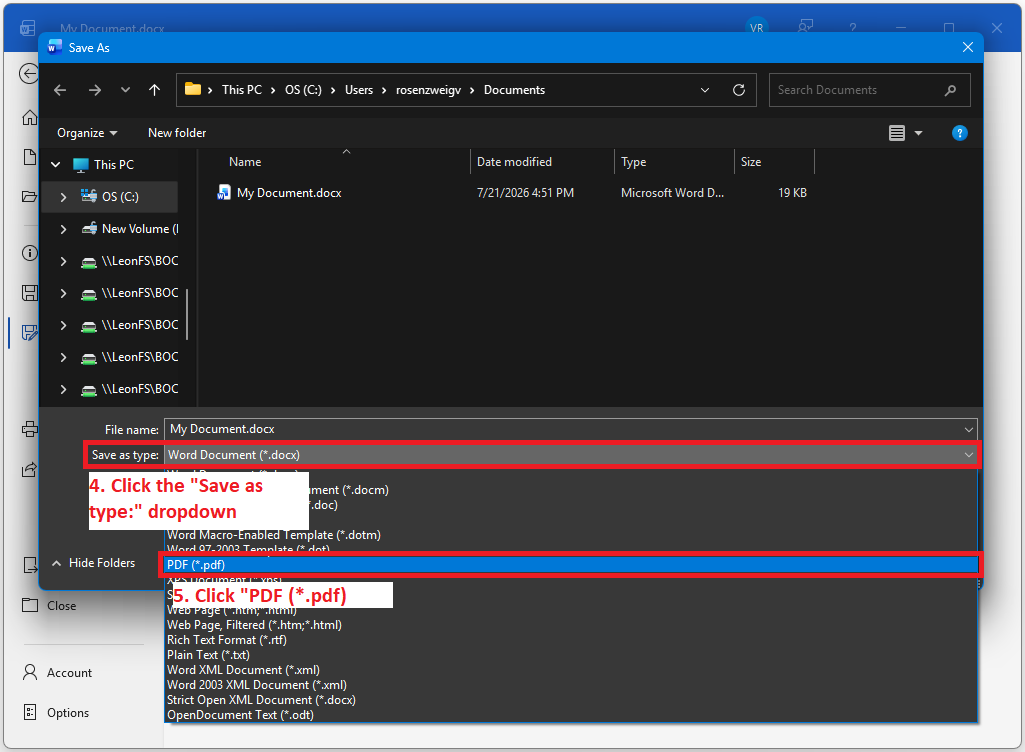
- Open the "Save as Type:" Dropdown
- Select "PDF (*.pdf)"
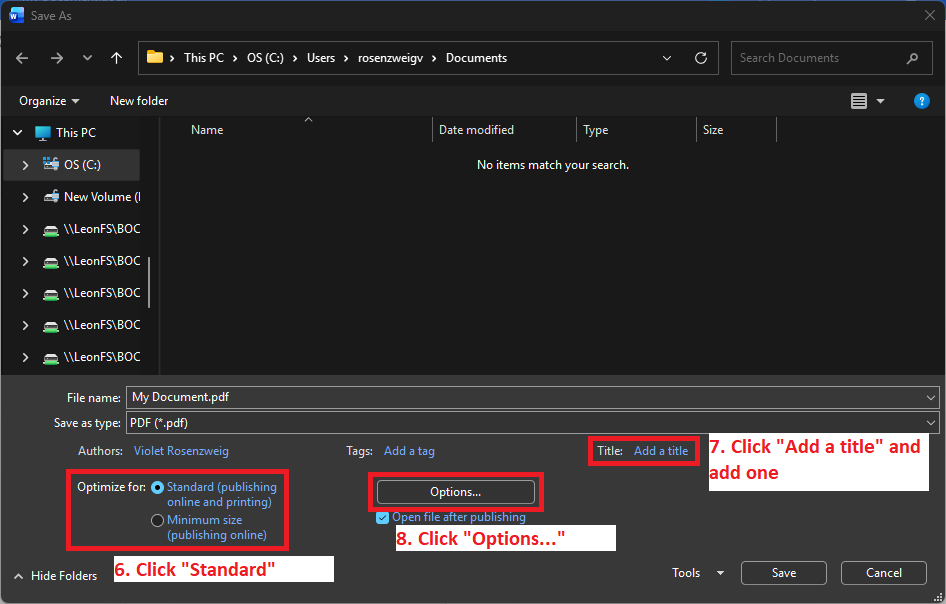
- Under the "Optimize for:" label, select "Standard (publishing online and printing)" if not already selected
- Under the "Title:" label, add a title.
- PDFs must have a title to be accessible (WCAG 2.1 SC 2.4.2). Always ensure you set an appropraite title. This is particularly easy to forget for documents where you are updating from a previous version with an existing title where it should be changed (for example, an agenda, or meeting minutes).
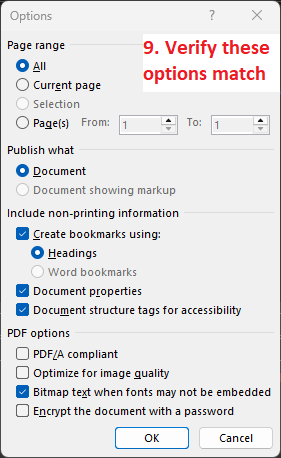
- Click "Options..." to open the options menu
- Verify the following options are selected. The other options are up to you, but these are critical for accessibility.
- Check "Create bookmarks using:"
- Check "Document properties"
- Check "Document structure tags for accessibility
- Do not check "PDF/A compliant"
- Do not check "Encrypt the document with a password"
- Click "OK" to dismiss the options dialog, and "Save" to save the PDF
3. Prevent Mistakes with "Restrict Editing"
Word provides an option under "Review > Restrict Editing" which allows you do disable styling the document beyond the predefined styles in the given design.
To help prevent mistakes, you can enabling this mode by
- Click "Restrict" in the ribbon, then the "Restrict Editing" button in the "Protect" panel.
- Under "1. Formatting restrictions", check the "Limit Formatting to a selection of styles" checkbox.
- Click the "Settings..." link, and check "Allow AutoFormat to override formatting restrictions".
- This allows you to do things like type 1. to start a number lists and * to create bullet lists
- Under "3. Start Enforcement", click the "Yes, Start Enforcing Protection" button. Do not set a password, so you can disable it later if needed.
To create bold or italicized text, you will have to use the "Styles" menu to select "Strong" or "Emphasis" respectively. Using these styles does provide an advantage, as some Design options will add colors in addition to bold/italics for these styles.
Feedback